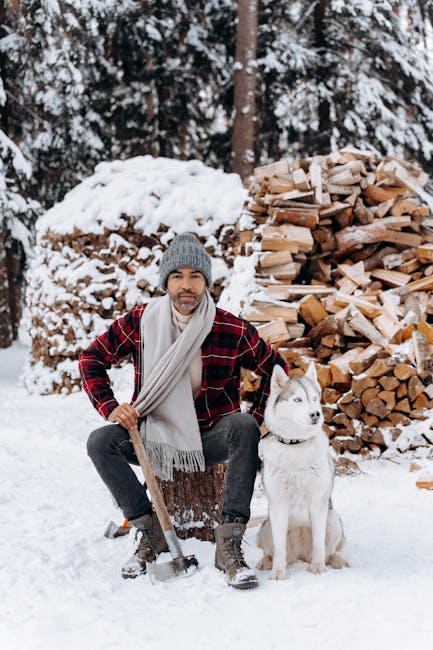
Imagine finding yourself in the wild, far from the comforts of home. Your surroundings are unfamiliar, and the challenges ahead are daunting.
The key to thriving in such situations lies in your survival gear. But what if you could create your own? This not only saves money but also ensures your gear is tailored to your needs. How can you make survival gear that stands up to the test?
This guide will show you how, step by step, transforming your skills and boosting your confidence. As you read on, you'll discover practical tips, clever hacks, and expert advice that make crafting survival gear simple and effective. Dive in, and unlock the secrets to making gear that could one day save your life.
Choosing The Right Materials
Selecting durable and lightweight materials is key in crafting reliable survival gear. Choose items resistant to wear and adaptable to harsh environments. Focus on versatility to ensure efficiency in various survival situations.
Choosing the right materials for your survival gear is crucial. The materials you choose can mean the difference between comfort and discomfort, safety and risk. Understanding which materials work best in different situations can elevate your outdoor experience and keep you prepared for the unexpected.
1. Understanding Material Durability
Durability is a key factor when selecting materials. You want something that can withstand harsh conditions and last over time. Consider using materials like nylon or polyester, known for their strength and resistance to wear and tear. When I first started making survival gear, I chose cotton because it was comfortable. However, I quickly learned that it absorbed water easily and dried slowly. This taught me the importance of choosing durable materials that can handle diverse weather conditions.
2. Assessing Weight And Portability
Weight plays a critical role in your survival gear’s effectiveness. Lightweight materials allow you to move quickly and pack more efficiently. Materials such as titanium and aluminum are excellent choices for items like cookware and tools. Imagine hiking up a steep trail with a heavy backpack. Your energy drains faster, and you become less agile. Choosing lighter materials can help you conserve energy and stay nimble in the wild.
3. Evaluating Weather Resistance
Weather resistance is a must-have feature in survival materials. You need materials that repel water and provide insulation against cold temperatures. Gore-Tex and waxed canvas are popular options for their water-resistant properties. Think about the last time you were caught in the rain without proper gear. It’s uncomfortable and potentially dangerous. By selecting weather-resistant materials, you ensure that your gear can protect you when nature throws a curveball.
4. Considering Cost-effectiveness
Balancing quality and cost is essential. High-quality materials can be expensive, but they often last longer and perform better. It's wise to invest in materials that offer the best value for your budget. I once opted for the cheapest materials to save money. The gear didn’t last a season, and I ended up spending more on replacements. This experience taught me that investing in quality materials can save money in the long run.
5. Exploring Versatility And Functionality
Versatile materials add value to your survival gear. Look for materials that can serve multiple purposes or adapt to different needs. Paracord is a prime example, useful for shelter building, repairs, or even as a fishing line. Ask yourself, can this material serve more than one function? By choosing versatile materials, you create a gear setup that is both efficient and adaptable to various situations. Selecting the right materials for survival gear can feel overwhelming, but it doesn’t have to be. With these insights, you can make informed decisions that enhance your outdoor adventures. What materials will you choose for your next survival gear project?
Creating A Survival Backpack
Crafting a survival backpack involves selecting essential gear like a sturdy knife, first aid kit, and water purifier. Choose durable materials to withstand harsh conditions. Pack compact, lightweight items to ensure easy carrying during emergencies.
Creating a survival backpack is a crucial skill for anyone interested in being prepared for emergencies. Whether you're facing a natural disaster or planning an adventurous hike, a well-equipped survival backpack can make all the difference. Imagine you're in the wilderness, miles away from civilization, and the weather suddenly changes. Your backpack is your lifeline. You need it to be reliable and packed with essentials. Let's dive into how you can create a survival backpack that meets your needs and keeps you safe.
Selecting The Backpack
Choosing the right backpack is the first step. You want something durable and comfortable. Think about size. A backpack that's too large might be cumbersome, but one that's too small won't hold everything you need. Look for backpacks with multiple compartments. This helps in organizing your gear efficiently. Padded straps can make carrying heavy loads more comfortable, especially during long hikes. Consider the material. Water-resistant fabrics can protect your gear from unexpected rain. It's worth investing in quality, as your backpack is your survival kit's foundation.
Organizing The Contents
Once you have your backpack, the next task is organizing what goes inside. Prioritize essentials. Start with items like water, food, and a first aid kit. These are non-negotiable. Use compartments and pockets to separate items. Quick access can be crucial in emergencies. You don't want to dig through everything to find a flashlight when night falls. Think about weight distribution. Heavy items should be placed close to your back to reduce strain. Balancing your load can make carrying the backpack easier and prevent injury. Can you think of an item you'd never leave behind when heading out on an adventure? Your choice might be unique, but remember to pack it wisely. Creating a survival backpack requires thought and planning. But once you're equipped, you'll feel more prepared for whatever comes your way.
Water Purification Techniques
Creating survival gear involves learning water purification techniques. Clean water is essential for survival. Methods like boiling, filtering, and using purification tablets help make water safe to drink. These techniques are easy to learn and crucial in emergencies.
When you're out in the wild, having clean drinking water is crucial. Whether you're camping, hiking, or facing an emergency situation, knowing how to purify water can be a lifesaver. In this section, we'll explore various water purification techniques that you can implement using survival gear. From DIY water filters to boiling and chemical methods, these strategies will help ensure you have safe water to drink.
Diy Water Filters
Creating a DIY water filter is a straightforward yet effective method to purify water. You can use materials like sand, charcoal, and gravel. Layer these in a bottle or container, starting with gravel at the bottom, followed by sand, and finally charcoal. This setup helps remove impurities and sediments from the water. Reflecting on a camping trip, I discovered this technique when clean water was scarce. It worked surprisingly well, giving me clear water when I needed it most. Have you ever tried making a filter yourself?
Boiling And Chemical Methods
Boiling is one of the simplest ways to purify water. Heat the water to a rolling boil for at least one minute. This kills most bacteria and viruses, making it safe to drink. If you're at a higher altitude, boil for three minutes instead. Chemical methods involve using tablets or drops like iodine or chlorine dioxide. These chemicals effectively kill pathogens. Always follow the instructions on the packaging for best results. During a hiking expedition, my friend forgot the water purification tablets, and boiling became our go-to solution. It made us realize the importance of having multiple options. Do you keep purification tablets in your survival kit? Using these techniques, you can ensure access to clean water in various scenarios. Whether you prefer the simplicity of boiling or the efficiency of chemical methods, each has its place in your survival arsenal.
Building A Shelter
Building a shelter is crucial for survival in the wild. A well-constructed shelter provides protection from harsh weather and predators. It also offers a sense of security and comfort. Creating a sturdy shelter requires careful planning and resourcefulness.
Choosing The Site
Pick a location that is dry and flat. Avoid areas prone to flooding. Check for potential dangers like falling rocks or dead trees. Ensure your site is close to water sources but not too close to avoid flooding. Look for natural barriers like hills or large trees for extra protection.
Using Natural Materials
Gather materials like branches, leaves, and grass. Use sturdy branches for the framework of your shelter. Layer leaves and grass for insulation. Find large rocks or logs to secure your structure. Use mud or clay to fill gaps and provide extra warmth.
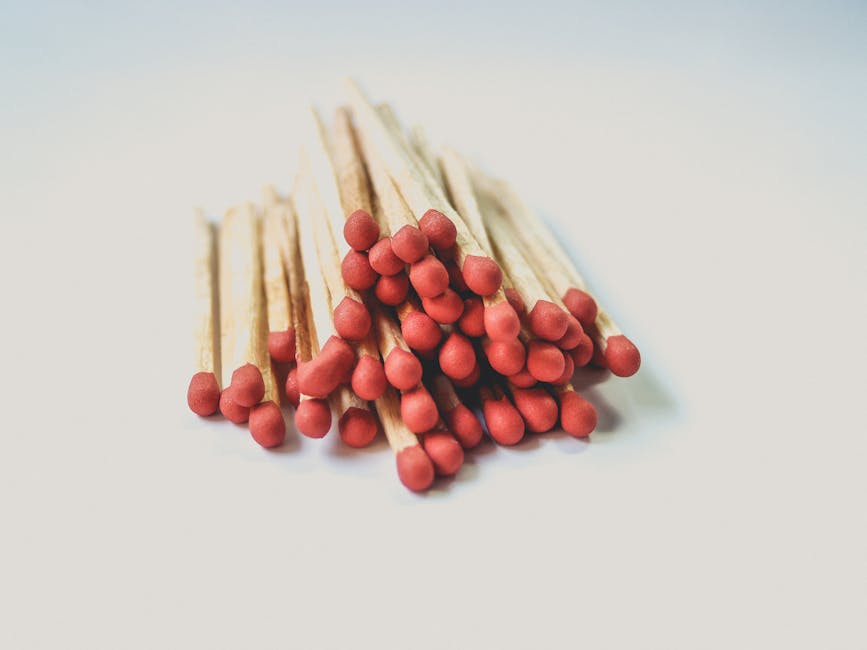
Crafting Fire Starters
Crafting fire starters is a crucial skill for survival enthusiasts. In emergencies, the ability to start a fire can mean warmth, safety, and even food. Creating effective fire starters at home is both economical and practical. Let's explore how to make them using common household items and natural materials.
Using Household Items
Many household items can double as fire starters. Dryer lint is a fantastic choice. It's highly flammable and easy to collect. Simply gather lint from your dryer filter. Combine it with a bit of petroleum jelly for a reliable fire starter.
Old newspapers also work well. Roll them into tight balls or twists. Ensure they are dry for the best result. Another option is cotton balls soaked in petroleum jelly. They ignite quickly and burn steadily.
Egg cartons make excellent holders for your fire starters. Fill each cup with your chosen material. Seal it with melted wax from old candles. This method keeps them waterproof and ready for use.
Natural Fire Starters
Nature provides various materials for fire starting. Dry leaves and grass are abundant and easy to collect. Gather them from the ground in dry weather. Form them into small bundles for quick ignition.
Pine cones are another great natural fire starter. They contain resin, which burns well. Collect dry pine cones and store them for future use. Birch bark is also valuable. Its natural oils make it flammable, even when wet.
Fatwood, or resin-rich wood, is excellent for fire starting. Look for it in the heartwood of pine trees. It burns hot and long, making it ideal for wet conditions.
Assembling A First Aid Kit
Creating survival gear involves assembling a first aid kit with essential items like bandages, antiseptic wipes, and pain relievers. Consider including tools such as scissors, tweezers, and gloves for emergencies. Tailor the kit to your specific needs, ensuring you're prepared for unexpected situations.
Assembling a First Aid Kit is an essential step in preparing your survival gear. It's not just about having bandages and antiseptics; it's about being prepared for unexpected injuries and illnesses. Whether you’re planning a wilderness adventure or just want to be prepared at home, a well-stocked first aid kit can be your lifesaver.
Essential Items
A first aid kit should cover a range of common injuries and conditions. Start with basics like adhesive bandages, sterile gauze, and antiseptic wipes. These are vital for treating cuts and scrapes. Add a pair of scissors for cutting tape or gauze. Include tweezers to remove splinters or ticks. A digital thermometer helps monitor fevers. Pain relievers like ibuprofen or acetaminophen are crucial for headaches or minor aches. Include antihistamines for allergic reactions. Don't forget a first aid manual—knowledge is power in emergencies.
Customizing For Specific Needs
Your kit should reflect your unique circumstances. Think about any health conditions you or your family members have. Add necessary medications that cater to those needs. If you’re hiking in tick-heavy areas, consider adding tick removal tools. If someone is prone to blisters, pack blister pads or moleskin. Consider where you'll use your kit most. For home use, include items like burn ointment for kitchen accidents. If you’re outdoors often, waterproof bandages can be a lifesaver. Remember, a first aid kit is not a one-size-fits-all solution. What unique items will make your kit more effective? Tailoring your kit can mean the difference between a minor annoyance and a major problem.
Diy Navigation Tools
Crafting your own survival gear includes making DIY navigation tools. These essential items help you find your way outdoors. Using simple materials like sticks and stones, you can create a compass or map. Knowing how to make these tools boosts your survival skills.
Navigating the wilderness without modern technology can be daunting. Still, creating your own DIY navigation tools can be both empowering and life-saving. Whether you find yourself lost in the woods or just want to enhance your outdoor skills, learning to make and use these tools is essential. Understanding nature's signs can guide you safely back to civilization or to your desired destination.
Creating A Compass
Building a simple compass can be a fun and rewarding project. Start by gathering a needle or a small piece of metal and a magnet. Rub the magnet along the needle in one direction around 30 times. Float the needle on a leaf in a bowl of water. Watch as one end of the needle points north. This method provides a basic sense of direction, a critical survival skill when landmarks are scarce.
Reading The Stars
Stargazing isn't just for romantics; it's a practical skill for navigation. On a clear night, locate the North Star, also known as Polaris. It’s found by tracing the line of the two stars at the end of the Big Dipper's bowl. The North Star stays fixed in the sky, marking the direction of true north. Practice identifying constellations like the Big Dipper and Orion to help you navigate. Each has its unique position and can guide you, even without a compass. Have you ever tried relying solely on nature for direction? It’s a humbling experience that connects you deeply with the environment. Developing these skills can not only prepare you for emergencies but enrich your outdoor adventures.
Making Signal Devices
Creating survival gear involves more than just basic tools. Signal devices play a crucial role in emergency situations. These tools help you alert rescuers or nearby people. Properly made signal devices can save lives. Let's explore how to make effective signal devices.
Visual Signals
Visual signals are key for catching attention. Mirrors are simple yet effective. Use a small mirror to reflect sunlight. Aim the light towards your target. Flashing the mirror increases visibility.
Bright clothing also works well. Attach strips to trees or rocks. These create a contrast with the environment. Bright colors stand out in natural settings.
Fires are another visual option. Build a fire in an open area. Add green leaves to create smoke. Smoke signals can be seen from afar.
Sound Signals
Sound signals break through the silence. Whistles are compact and loud. Blow three short blasts for distress. This pattern is recognized worldwide.
Banging metal objects creates noise too. Use pots, pans, or sticks. Hit them together to produce sound. This method can be heard over long distances.
Voice signals also help. Shouting in short bursts catches attention. Ensure the area is quiet first. This increases the chance of being heard.
Constructing A Fishing Kit
In a survival situation, having a reliable fishing kit can be vital. Catching fish provides a crucial food source. Constructing a fishing kit requires basic tools and some creativity. You can build a simple kit with minimal resources. Let’s explore how to create an effective fishing kit.
Basic Fishing Tools
Start with essential fishing tools. A sturdy fishing line is crucial. Nylon or monofilament lines work well. Keep at least 10-20 meters of line. Hooks are also vital. Small to medium hooks catch a variety of fish. Sinkers help the line sink. Use small rocks if you have no sinkers. A simple float can be made from cork. It keeps bait off the bottom. A multi-tool or knife aids in cutting and preparing fish. Lastly, pack a small container for storing items.
Improvised Fishing Methods
Improvised fishing methods can save you in a pinch. Handlines are effective. Wrap the line around a stick or bottle. This allows for easy casting. Create a fishing spear using a sharpened stick. Attach multiple sharp points for better success. Traps can catch fish passively. Use rocks to create a fish trap in shallow water. Bait with insects or worms. Nets or cloth can also work as fish traps. Spread them across small streams or ponds.
Sewing And Mending Gear
Creating survival gear through sewing and mending is practical and rewarding. With basic tools like needles, thread, and fabric, you can craft durable items. These might include backpacks, tents, and clothing repairs. Skills in sewing enhance preparedness, ensuring you have reliable gear in any situation.
In the realm of survival gear, sewing and mending are vital skills that can make a significant difference in your outdoor adventures. Picture this: you're on a hiking trip, and your backpack strap snaps. Having the ability to stitch it back together on the spot can save your hike. Sewing and mending gear is not just about fixing things; it's about ensuring your equipment remains reliable. This section will guide you through the basics of sewing skills and how to repair outdoor clothing effectively.
Basic Sewing Skills
Starting with basic sewing skills is essential. You don't need to be a tailor to patch up a torn jacket or fix a broken tent seam. Invest in a small sewing kit that includes needles, thread, scissors, and safety pins. These items can fit easily into your backpack. Practice simple stitches like the running stitch and backstitch. They're perfect for quick repairs and hold up well under stress. With a few basic stitches mastered, you're ready to tackle minor repairs on the go. You'll be surprised how quickly you can mend a tear or reattach a button.
Repairing Outdoor Clothing
Outdoor clothing is subject to wear and tear, especially in rugged environments. Knowing how to repair it can extend its life significantly. Imagine the confidence you'll gain when you can sew up a ripped sleeve while camping. It's a skill that keeps you prepared for unexpected challenges. Inspect your gear regularly for any damages. Catching a small tear early can prevent it from becoming a bigger problem. Use patches to reinforce worn areas, like the elbows of a jacket. They're quick to apply and add durability to your gear. Consider the materials you're working with. Some fabrics require special needles or thread, so keep them handy in your sewing kit. Repairing your outdoor clothing is not just about maintenance—it's about enhancing your survival readiness. What would you do if your gear failed at a crucial moment? Having sewing skills can be the difference between discomfort and a successful adventure.
Frequently Asked Questions
What Is Essential Survival Gear To Make?
Essential survival gear includes a knife, fire starter, water filter, and shelter materials. These tools are crucial for safety and sustenance. Having a reliable knife and fire starter ensures you can create warmth and cook. Water filters and shelter materials protect against harsh elements.
How Can I Make A Diy Survival Kit?
To make a DIY survival kit, gather essential items like a first-aid kit, multi-tool, and emergency blanket. Use a waterproof container to store these. Customize your kit based on your environment and needs. Regularly check and update your supplies to ensure they are functional.
Which Materials Are Best For Survival Shelter?
For a survival shelter, use natural materials like branches, leaves, and moss. These materials provide insulation and camouflage. A tarp or emergency blanket adds waterproofing. Prioritize a location that’s dry and safe from potential hazards. Ensure your shelter is sturdy to withstand weather conditions.
How Do You Make A Homemade Water Filter?
To make a homemade water filter, use layers of sand, charcoal, and gravel. These layers remove impurities. A plastic bottle or similar container is ideal for housing the filter. Pour water through slowly, allowing each layer to filter contaminants. Always boil filtered water before drinking.
Conclusion
Creating survival gear at home can be rewarding and practical. Basic skills lead to useful tools for emergencies. Always choose durable materials for lasting items. Practice techniques regularly to refine skills. Safety is crucial; prioritize it in every project. Join online communities for shared tips and ideas.
This fosters learning and creativity. With dedication, you’ll build a reliable survival kit. Remember, preparation is key in uncertain times. Equip yourself well and stay ready for any adventure. Your homemade gear can make a big difference. Keep exploring, learning, and crafting with purpose.